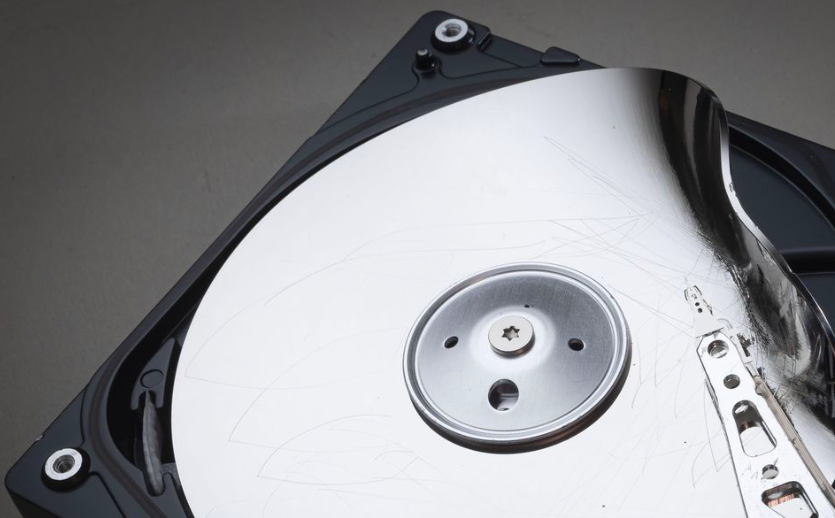
Hard Disks play a crucial role in Laptops and 90s computer systems. One of the most significant roles of Hard Disks is to store user’s data permanently. In the event that your hard Drive shows a “Hard Disk Not Showing Up” error, you may brood over the safety of your data. Thus, we bring a brief guide for how to fix this error.
Introduction
For the most part, if your PC encounters a “Hard Disk Not Showing Up” error, it means that you are unwilling to access any type of data, be it application, software, files, or folders saved on your PC. To begin with, this error may be a sign that your Hard disk is damaged and your data is at a big risk. On the other hand, it can be due to a basic problem such as loose wires. What to do in that situation? You will find out in this reading.

To begin with, there are multiple rationales for Hard Disk Not Showing Up Error to occur over and over again until your PC overheats and shuts down. But, believe it, you don’t want to get to the last stage because it can do a bundle of damage to your device. Thus, to understand the problem with a microscopic view, let’s count down why the Hard Disk Not Showing Up error appears in the first place.
Why Hard Disks Not Showing Up on Windows PC?
#1: Impaired Hard Disk Drive is in use
When your Windows 10 PC starts to act up while performing common tasks such as opening a browser or accessing a folder in My Computer, it may be a sign that your Hard Disk is not functioning with its full capacity.
Remember, small damage to Hard Disk Drive can improvise over time. Before you know it, you are dealing with a completely impaired hard disk that will take a lot of repair costs. Hence, if the Hard Disk Not Showing Up error comes up on your screen. Please go back and check if all the other files, folders, and applications are easily accessible or not.
If they are not, it means that your HDD’s solidity has been compromised.
#2: Corrupted File System
From time to time, users compromise their PC’s functional power by using non-ethical ways to shut down and start up the system. For example, many users use the power button (press & hold) tactic to shut down the PC. However, such a method causes the files to create a corrupt copy every time because their mainstream software is not closed properly.

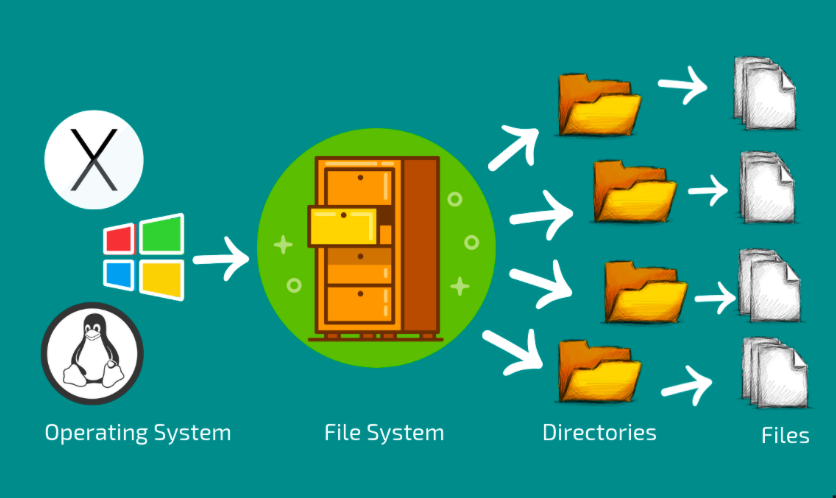
Due to endless corrupt files in the file system, Hard Disk Drive becomes incapable of dealing with wrongful files. Thus, the mentioned error shows up.
#3: Hard Disk not showing up? Lack of compatibility to the latest Windows 10 version
To begin with, this is one of the rarest situations due to which a Hard Disk Not Showing Up error will appear on the screen. In other cases, the error may have different uses of vocabulary, such as “Hard Disk Not Detected.”
For a hard drive to be compatible with your PC, the SATA version must match the motherboard version. For example, SATA and SATA 2.0 both are functional on the latest motherboard in Dell or HP Laptops.
#4: Other Possible Causes Of Undetectable Hard Disk
Alongside the above-mentioned causes of the Hard Disk Not Showing Up error on your PC, there can be other possibilities. For example, lose connection of SATA wires. In the case of removable Hard Disk, Drive Letter Conflict is a possible explanation for HDD to remain undetectable. You may wonder what Drive Letter is?
Drive letter is an alphabetical allocation from A to Z to HDD space on the motherboard. If the Drives in the PC are not maintained on the assigned letter, different disks may interrupt the PC’s performance level.
For example, if you are using (C:) for both Hard Disk as well as CD Drive, Hard Disk will remain undetectable.
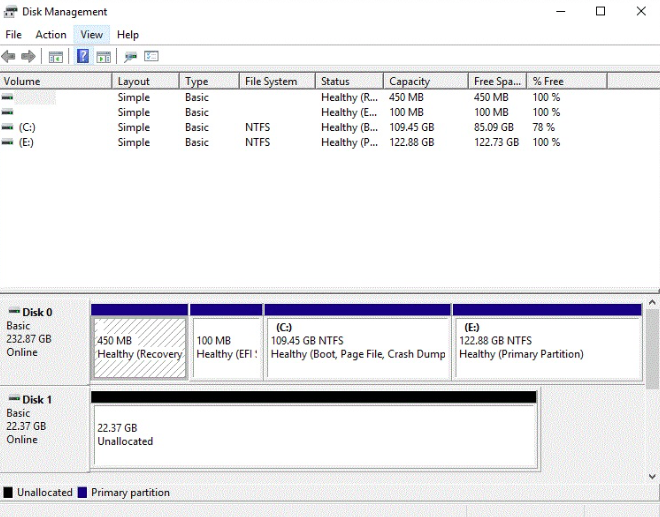
For the most part, users can manually change drive letters to avoid conflict by accessing disk management.
Six Methods to Fix Hard Disk Not Showing Up Error in Windows PC
Method 1: Reset Drive Letters
As mentioned before, it is widely possible for users to manually change previously assigned drive letters in Windows. Now, remember, there are some rules that are set for drive letters.
(For beginners, Drive letters are the letters that you view while accessing a drive. For example, Floppy Disks mainly show (C:) in NTFS File System). Similarly, For HDD, DVD, CD, portable or external Hard Drive, A and B letters cannot be used. Thus, you can use any letter that falls between C and Z.
Here’s a brief guide on how to reset or reassign Drive Letters:
- First of all, open the Windows 10 Menu.
- Click on the Start Menu option or simply press the Windows Key.
- Locate the “Disk Management” option and tap on it.
- Further, a complete list of active drives will appear with allocated letters.
- Select the Drive you want to transmit the Drive Letter for. (In this case, HDD).
- For Hard Disk, pick any letter between (C and Z).
To change the letter, follow the given steps:
- Click on the “Actions” option.
- Select the “Change the Drive Letters and Paths” option.
- Let suppose (F:) is the existing drive letter.
- Click on it. Change it to (E:), maybe.
- Click on the “OK” button.
Note: Please make sure that you choose a letter for HDD which is not identical to any other type of Drive.
Method 2: Repair or troubleshoot Disk Connection
To begin with, this method usually applies in scenarios where Hard Disk Drive is not detectable in Disk Management Section or File Explorer. Here’s a plausible explanation of why this may happen: When your disk is not properly connected to the PC through a SATA Cable, the PC wouldn’t be able to detect it. For the PC’s internal system, it is like a Hard Disk is not there at all.
Here’s how you can check whether your SATA Cable is properly connected or not:
- Check the cables’ condition (if there’s dust, broken plastic covering, or other wear and tear).
- If the condition of the SATA Cable is as good as new, make sure they are plugged in HDD properly.
- Restart Windows 10 and check for HDD in Disk management again.
In the event, that problem continues, visit a professional repairer nearby.
Method 3: Create a backup and format mainstream Hard Disk
More often than not, the undetected Corrupted file system became a bigger problem than it already is. It starts interrupting Hard Disk performance. As long as corrupt files are in your Drive, the corrupted file system will tear your HDD. At one point, the Hard Disk will stop showing up. This is when you will see the “Hard Disk not showing up” error.
The best solution to get rid of a corrupted file system is to wipe up all the data. It is recommendable to create a data backup beforehand.
Here’s a brief guide on how to format Hard Disk Drive:
- Go to the “Start Menu.”
- Scroll and locate the “Disk Management” option.
- Right-click on it.

- All existing drives’ lists will appear.
- Select “Hard Disk Drive, HDD” (please check the HDD Drive letter beforehand).
- Right-click on it.
- Click on the “Format” option.
- Tap on the “OK” button.
- Wait patiently.
After complete formatting, when you go back to “my computer” and tap on the HDD, you will find “no item” in it. It is also consequencial to note that whenever a Hard Disk Drive is dealing with a corrupted file system, its’ drive letter automatically changes to (Others:) or RAW.
Method 4: Hard Disk Not Showing Up? Create a new partition or path for Hard Disk
Sometimes, it is not the Hard Disk that is troublesome. Instead, it is the path or partition you have set up for it. Thus, to resolve Hard Disk Not Showing Up error on a temporary basis, follow the given steps to create a new partition for it:
Note: Instead of going to Disk Management from the Start Menu, the approach is changed. Check out the guide.
- Select the “This PC” icon and right-click on it.
- Click on the “Manage” option.
- Now, select “Disk Management.”
- Select existing HDD and right-click.
- Now, tap on the “New Simple Volume Wizard” option.
- Format Partition Dialogue box will appear.
- Create a new volume size (different from the previous one).
- Similarly, create a new Drive Letter.
- Set up the volume to New.
- Change the File System to NTFS (if it isn’t already).
- Click on the “Next” button to view advanced settings.
- Click on the “Finish” button to lock the new partition for the HDD.
To test the results, access Hard Disk Drive using the new path.
#Method 5: Change HDD settings in BIOS (Enable it)
From time to time, BIOS complicates OS’s performance in multiple scenarios. Without going into many details, please remember that if the HDD is disabled in BIOS, the operating system won’t detect it properly. As a consequence, the error “HDD is undetectable or not showing up” will appear consistently.
Here’s a brief guide on how to enable Hard Disk Drive in BIOS:
- Restart the computer system or laptop using the “Restart” option in the Start Menu.
- Now, press & hold the F2 key (Del as an alternative option).
- Release the key when BIOS Menu appears on the screen.
- Use the “Right Arrow key” to nominate the “Integrated Peripherals” option.
- Tap ENTER Button.
- Again, use the left arrow key to select the “USB Controller” option.
- Presuming that it is “Disabled.”
- Use the Left-Arrow key to change it to “Enabled.”
- Save the BIOS setting and exit the menu.
To exit, use the “ESC” key.
Recheck the HDD detection once you restart the PC.
#Method 6: Hard Disk Not Showing Up? Update HDD Disk Driver
Under no circumstances, a user is willing to risk Hard Disk’s performance. The reason being, it is where all the data permanently stores. If the compatibility of the Hard Disk with OS is compromised, you can suffer through major data loss. Thus, if none of the above solutions work for you, the mainstream problem may be with your HDD Driver. Here’s a quick guide to resolve it:
- Tap on the “Windows key” or Windows icon on the screen.
- Right-click on it.
- Go to the Device Manager.
- All software and drivers will appear.
- Locate Disk Drives option.
- Right-click on it.
- A list of Drives will appear.
- Locate Hard Disks.
- Click on it.
- Then, Tap on “Update Driver.”
- Sit back. It will take a while.
Restart the PC once this process is finished.
Note: If your Disk Driver is already up-to-date, it is recommendable to uninstall the existing driver and reinstall it.
Epilogue
We all face the same problems with our laptops every day. However, in the desperation to fix them, we end up damaging them more. This could lead to mental, physical, and financial loss too. Therefore, there is no need to panic in times like this.
You need to find out the leading or root cause of the problem. Then, you should try the best ways to fix it. You can refer to this article as well to check all the possible ways to rectify it. In the end, I hope you like this article. Thank you for your time! Take care and be safe!


